Sheet cutting plans
The Sheets tab packs rectangular panels into new sheets and compatible offcuts. It creates guillotine layouts, where every cut runs right across the current rectangular workpiece.
What is a guillotine cut?
A guillotine cut travels in one straight line from one edge to the opposite edge of the current rectangular workpiece. After an earlier cut divides a sheet, either resulting rectangle can become the current workpiece for a later cut.
Therefore, a later edge-to-edge cut does not always cross the original whole sheet. It crosses the smaller rectangle available at that step. The 2D progress view separates these workpieces as cuts are completed.
This differs from:
- Arbitrary nesting of curved or irregular outlines.
- CNC toolpaths that enter and leave material anywhere.
- Non-guillotine layouts where a cut stops inside the current rectangle.
Guillotine plans suit common workshop tools, give you a sequence that is easy to follow, and work well for rectangular furniture panels.
Read the plan
The sheet summary shows panel count, sheet kerf, existing inventory, and sheets to buy. Each sheet or offcut then shows:
- Its number, source, and physical dimensions.
- Parts, reusable area, discard area, and kerf area.
- A 2D or 3D view of the same underlying plan.
- Current rectangular workpieces.
- Numbered, dependency-aware cuts.
The 3D view is another way to inspect the plan, not a different layout. Use Show original to hide the full starting sheet after large waste pieces have been cut away, then Fit sheet to frame only the workpieces that remain. Printing always shows the panel plans in 2D, regardless of the on-screen view.
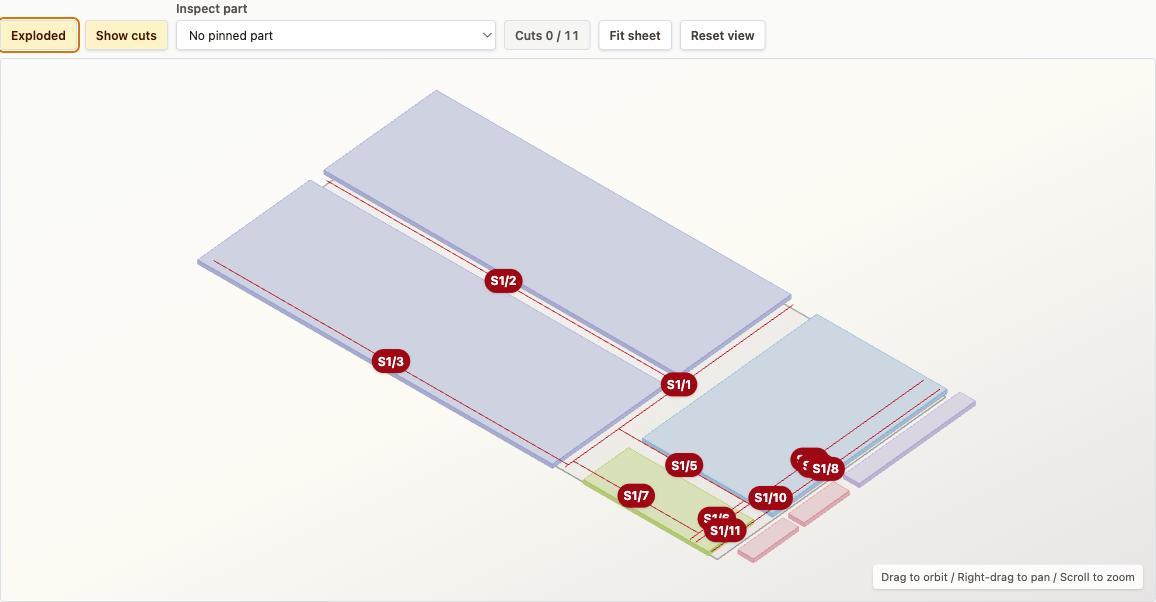
The interactive 3D view can separate the planned panels while keeping the numbered cut lines visible.
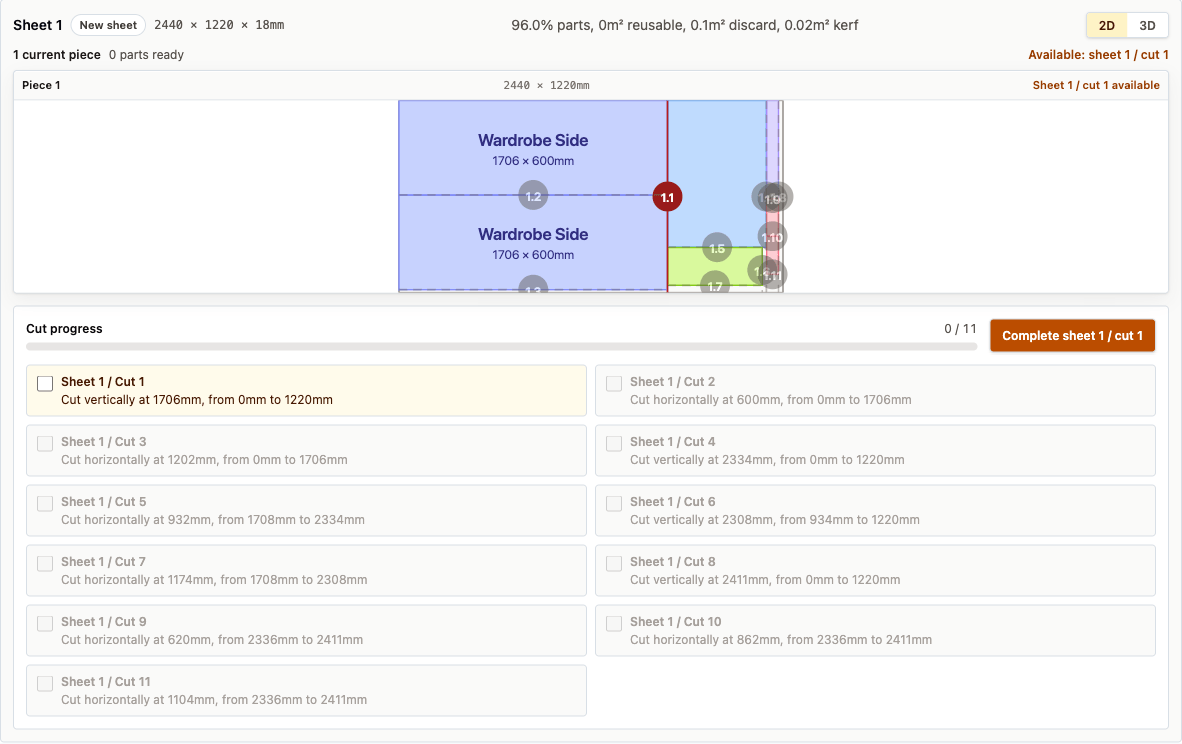
The cabinet example begins with one full rectangular workpiece. Only the first dependency-aware cut is available.
Cut order and progress
Cuts are numbered. Only cuts whose containing workpiece already exists are available. Completing a cut can reveal one or more later cuts. If you undo an earlier cut, dependent progress is also removed.
Use Complete sheet n / cut n as you work through the real cuts. Reset progress starts the displayed sheet again. Progress on an inventory offcut can be remembered locally; progress on new sheets starts fresh after a reload.
How coordinates work: Checklist measurements use the current piece shown above the checklist. A vertical position is measured from that piece's left edge, and a horizontal position is measured from its top edge. The
fromandtospan also starts from the current piece's edge, so you can use the instruction directly after separating it from the original sheet.
Rotation and orientation
SawWise normally allows a panel to rotate 90 degrees. This can improve fit. A rotated marker means the panel has changed orientation within the layout, not that the material has no direction.
Use Keep panel orientation in Parts, or the bulk Lock orientation action, when grain, face pattern, printing, or another design detail must run a particular way. SawWise does not detect grain direction automatically.
Sheet size to buy
Use Sheet size to buy above each material's layouts to choose the width and length you can buy. Presets include 405 × 810, 610 × 1220, 610 × 1830, and 1220 × 2440 mm. Choose Custom to enter another size in your display units, then select Apply size.
Check the updated purchase count, cuts, reusable offcuts, and waste after changing size. Your choice applies to that material and thickness in the current project, including parts with confirmed stock assignments. Compatible offcuts can still contribute to the plan.
If a part cannot fit, you will see its name and dimensions above the layouts. The purchase count covers only the parts that fit. Choose a larger size or review the part dimensions and orientation before buying material.
Older saved projects keep their full/half-sheet preferences, including full-sheet fallback, until you choose an explicit size. With an explicit size, SawWise keeps your chosen dimensions and flags parts that do not fit.
Unplaced panels
An unplaced panel did not fit the selected sheet or offcuts. It may be too large or locked in an orientation that prevents it fitting.
Try larger stock, corrected panel dimensions, or unlocked rotation, then check the recalculated plan.
Material-saving analysis
Could a tiny change save a whole sheet? tests one sheet-part dimension at a time, reducing it in small steps up to the selected maximum. It reports changes that reduce the number of purchased sheets in the tested packing result.
Think of this as an idea generator rather than an automatic design edit. If a suggestion still works with your joinery, clearances, hardware, strength, appearance, and connected parts, make the change in SketchUp and import the new model.
Kerf and real cutting
Sheet blade kerf reserves the width removed by each planned cut. A test cut gives you a useful real-world value for your blade, material, and setup.
Before each cut:
- Find the current workpiece and its datum edges.
- Compare its real size and datum edges with the plan.
- Measure the displayed relative position from the named edge, then choose the correct blade side.
- Check grain or face direction and support both resulting pieces.
- Follow the normal guidance for your saw, track, guards, and workholding.
Existing material can be included through the offcut inventory.